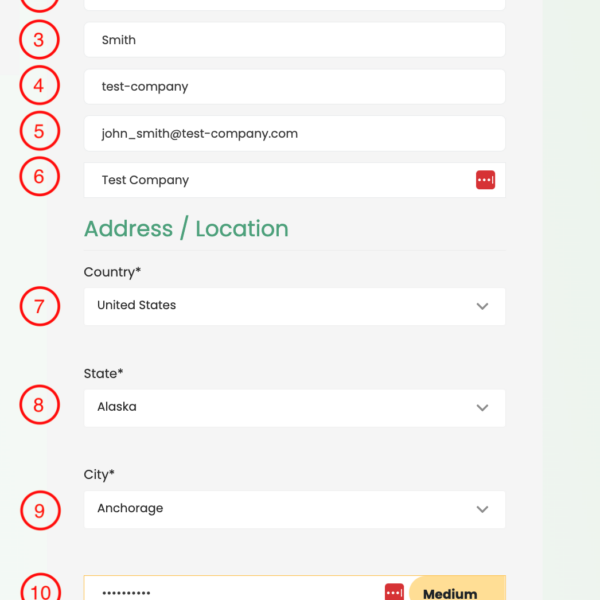
1. Select “Agency”;
2. Enter your name;
3. Indicate your last name;
4. Create a username (you can use a hyphen, spaces and other special characters are not allowed);
5. Provide a real email address;
6. Enter the company name (with spaces possible);
7. Select a country from the drop-down list;
8. After this, a list of states will appear; select state;
9. Select a city from the list that appears;
10. Manually set a password with numbers, letters of different case and special characters;
11. Repeat the password;
12. Agree to the terms of use and click the “Sign Up” button.
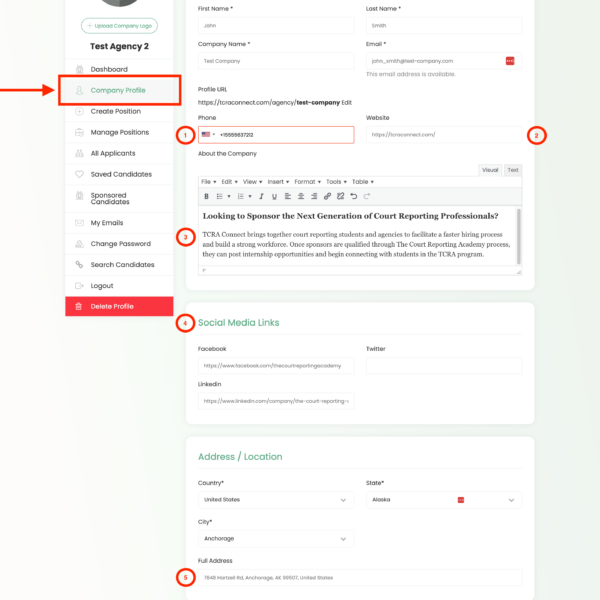
While our team approves your application, you can add or edit your profile. To do this, go to the “Company Profile” section of the dashboard. In addition to what you already filled out when registering, you will find several new items here.
- Your phone;
- Your website;
- Description of the company;
- Links to social networks;
- Full address;
You can either add new information or change the information specified during registration.
Don’t forget to click the “Save Settings” button before exiting.
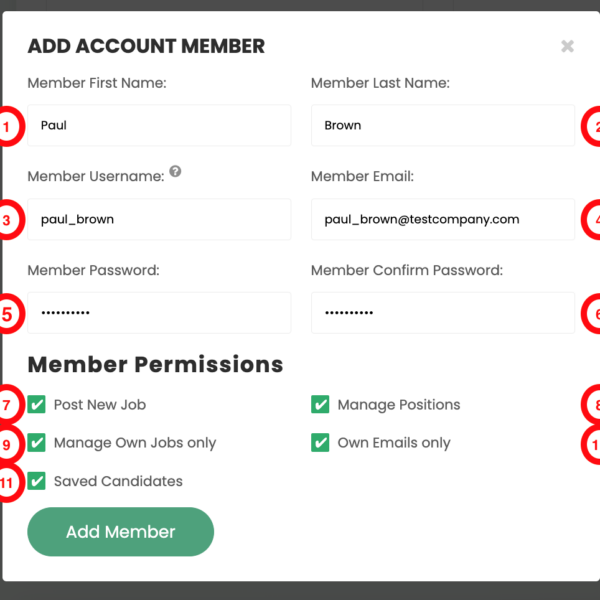
At the bottom of the page you will see a section called “Add Account Members”. Here you can give your employees access to position and candidate management.
After clicking the button, a window will pop up. Fill in the following fields:
- Member’s name;
- Name of the member;
- Member’s username;
- Member email;
- Password, which must include letters of different cases, numbers and special characters;
- Password confirmation;
Next comes the account member permissions section:
- Whether a member can publish new positions;
- Can he manage published positions, that is, edit or delete them;
- Does the member have access only to his own positions or also to those published by other members of the account (including you);
- Whether a member can only see their own emails or emails addressed to other users (including you);
- Whether the member can manage retained candidates;
After filling in all fields, click the “Add Member” button.
In this section we will describe the process of creating a position.
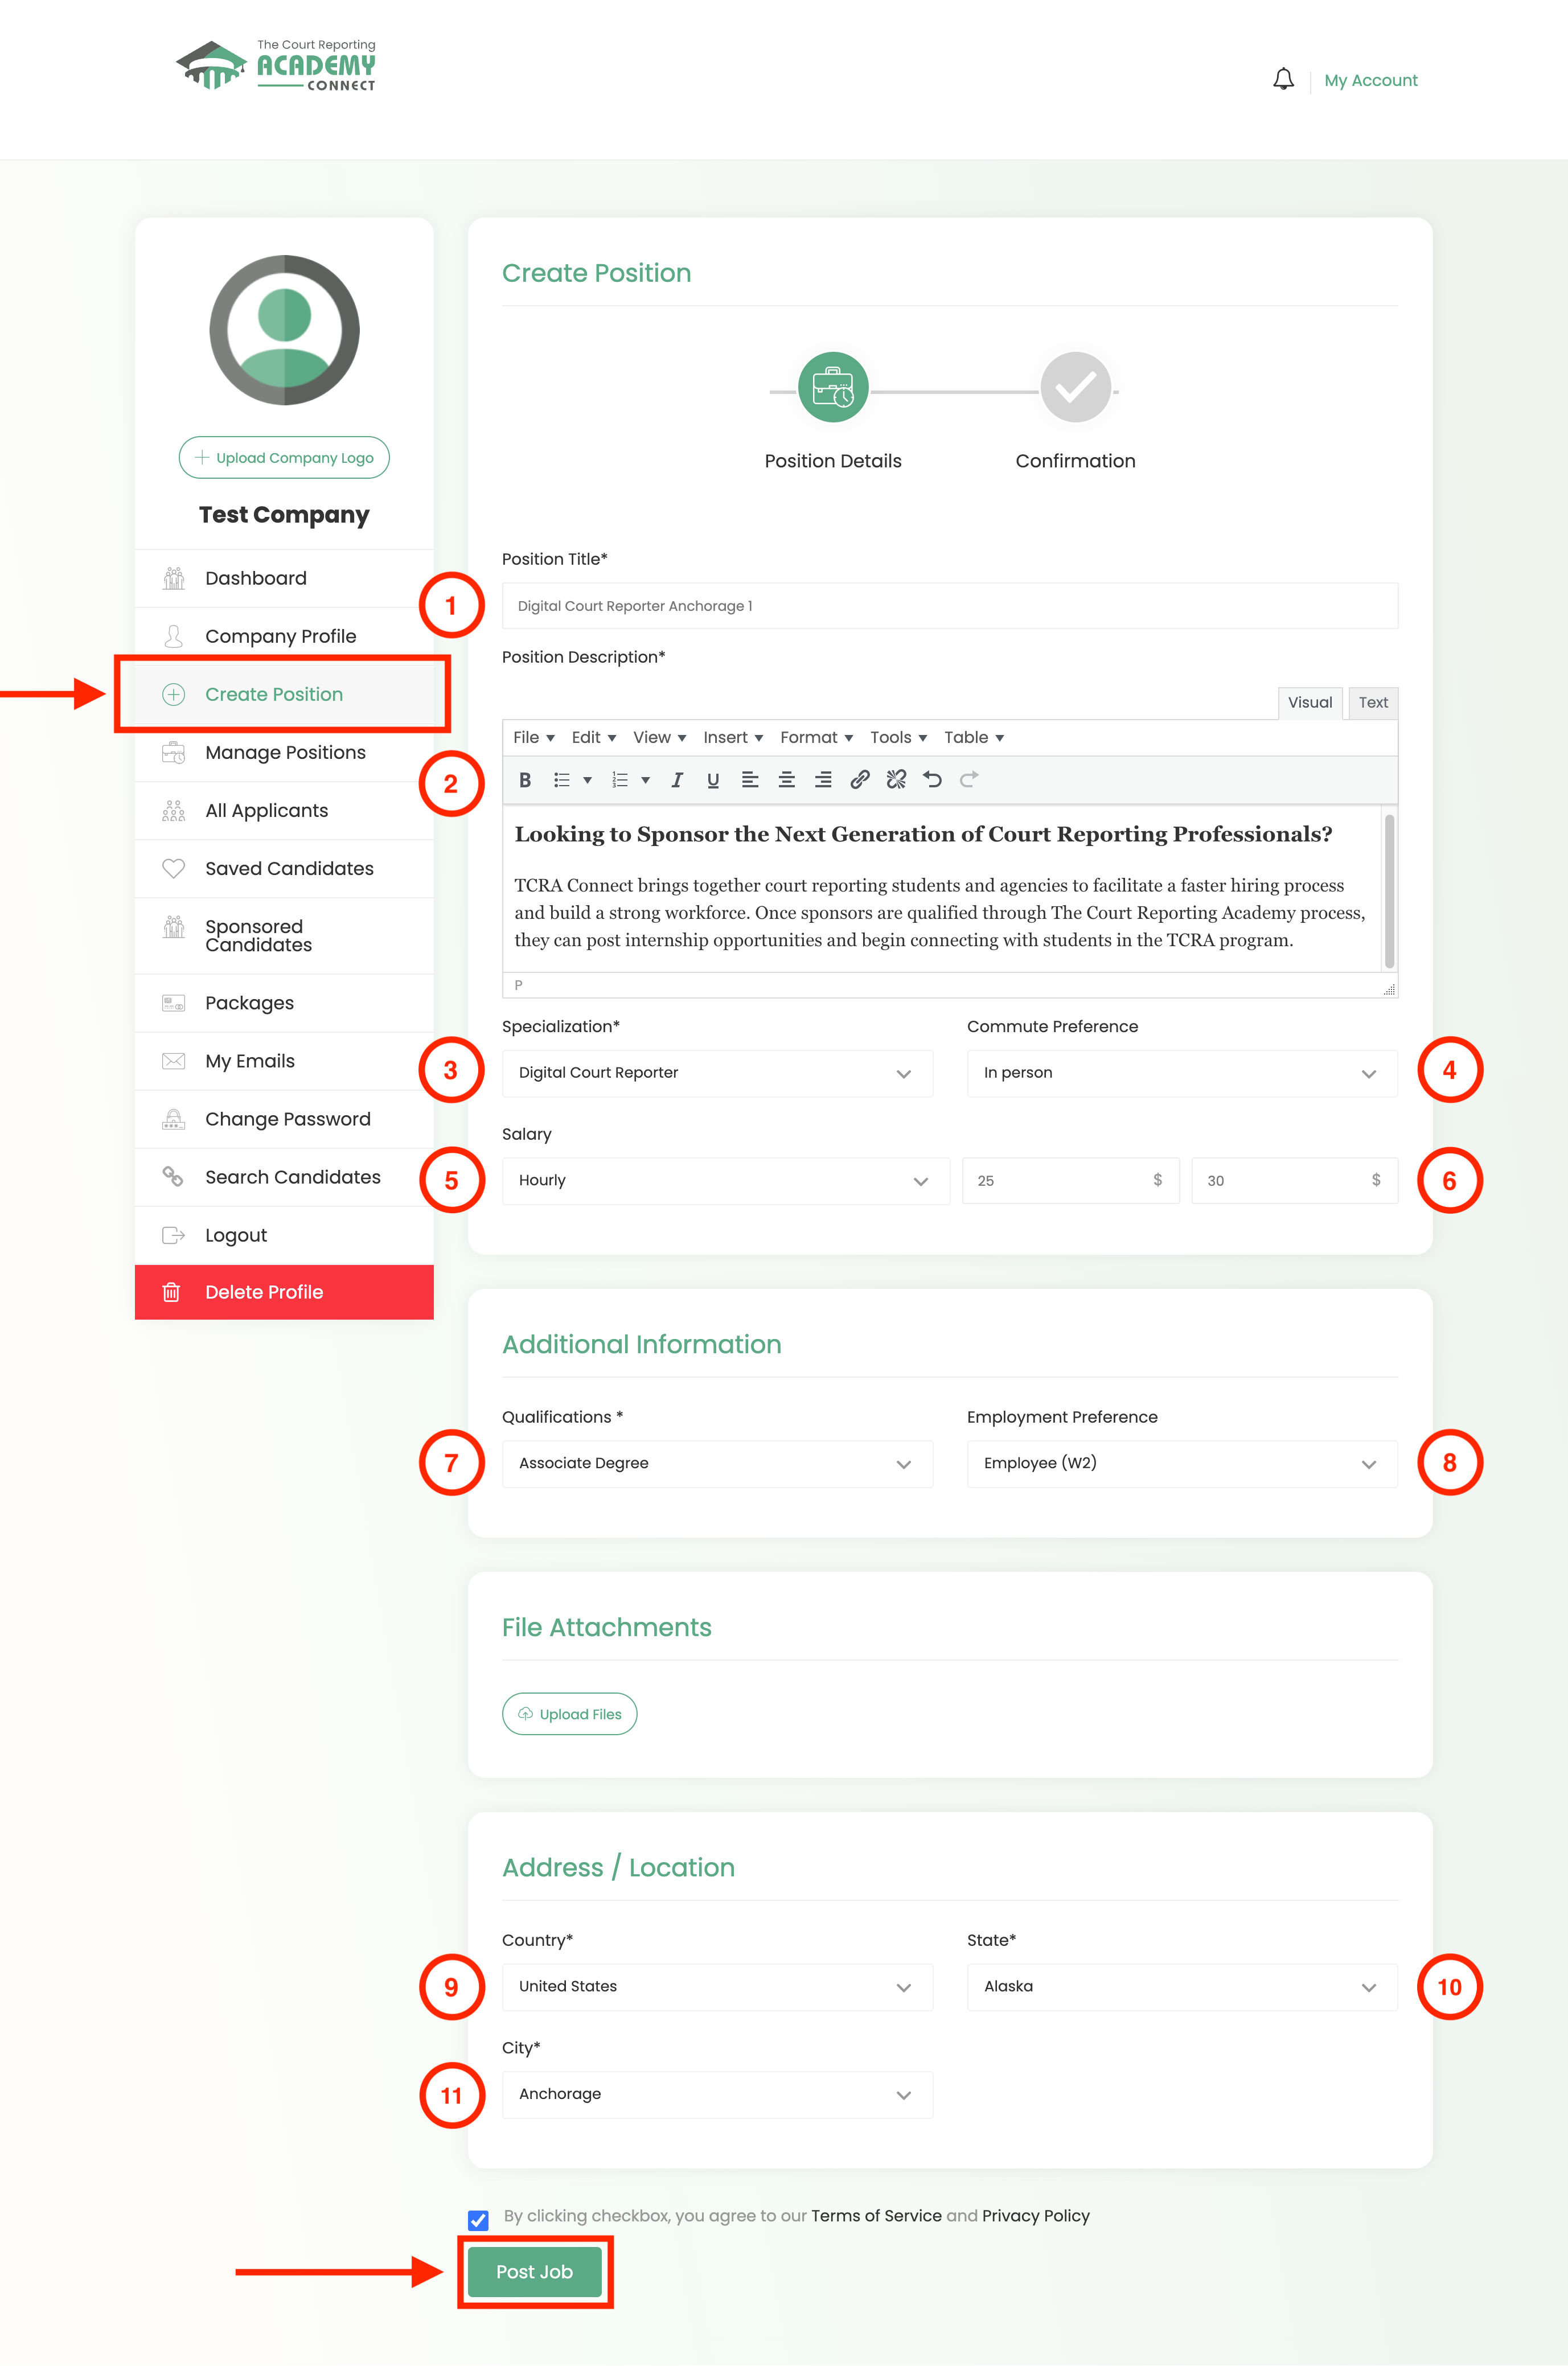
To get started, go to the “Create Position” section of your control panel.
- Come up with a title for your position. We highly recommend that you make them unique to make it easier for you to manage your positions later.
In the example, I wrote the title “Digital Court Reporter”, added a city in case you need to search for candidates in different cities, and set the index number to 1. - Specify a description for the position. You can use headings and simple formatting.
- Specify candidate’s specialization.
- Please indicate your preferred Commute Preference.
- Choose for which period it is more convenient for you to indicate your salary.
- Specify the minimum and maximum salary.
- Please indicate your required qualifications.
- Specify the Employment Preference.
- Select your country.
- Select a state.
- Select a city.
By default, your company’s address specified during registration is shown.
Agree to the Terms of Service and click the “Post Job” button
I am text block. Click edit button to change this text. Lorem ipsum dolor sit amet, consectetur adipiscing elit. Ut elit tellus, luctus nec ullamcorper mattis, pulvinar dapibus leo.
I am text block. Click edit button to change this text. Lorem ipsum dolor sit amet, consectetur adipiscing elit. Ut elit tellus, luctus nec ullamcorper mattis, pulvinar dapibus leo.
I am text block. Click edit button to change this text. Lorem ipsum dolor sit amet, consectetur adipiscing elit. Ut elit tellus, luctus nec ullamcorper mattis, pulvinar dapibus leo.
I am text block. Click edit button to change this text. Lorem ipsum dolor sit amet, consectetur adipiscing elit. Ut elit tellus, luctus nec ullamcorper mattis, pulvinar dapibus leo.
I am text block. Click edit button to change this text. Lorem ipsum dolor sit amet, consectetur adipiscing elit. Ut elit tellus, luctus nec ullamcorper mattis, pulvinar dapibus leo.
I am text block. Click edit button to change this text. Lorem ipsum dolor sit amet, consectetur adipiscing elit. Ut elit tellus, luctus nec ullamcorper mattis, pulvinar dapibus leo.
I am text block. Click edit button to change this text. Lorem ipsum dolor sit amet, consectetur adipiscing elit. Ut elit tellus, luctus nec ullamcorper mattis, pulvinar dapibus leo.
I am text block. Click edit button to change this text. Lorem ipsum dolor sit amet, consectetur adipiscing elit. Ut elit tellus, luctus nec ullamcorper mattis, pulvinar dapibus leo.
I am text block. Click edit button to change this text. Lorem ipsum dolor sit amet, consectetur adipiscing elit. Ut elit tellus, luctus nec ullamcorper mattis, pulvinar dapibus leo.


